


Panorama
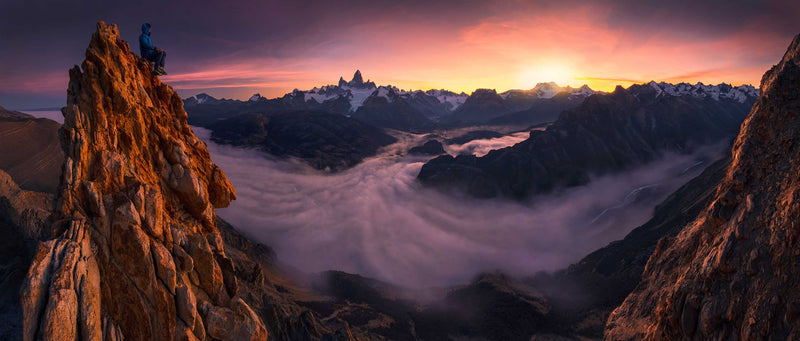
Most photographers consider a 2:1 ratio a panorama. My definition is a bit different. For me, the field of view is more important. If you need to stitch multiple photos together, shot at 15mm or less, I consider this a panorama.
The same composition rules apply to a panorama as to any other landscape photo. However, the main challenge with a panorama is what you can see in the field. Without moving your head, the composition often doesn’t fit within your field of vision. This requires even more previsualization of how the final image will look compared to a normal photo. Taking a test panorama with auto-stitching can help. However, you still need to consider that the final result may differ. A smartphone shot, for example, can look slightly different compared to one taken with your regular camera and lens.
Without going too much into detail, our eyes have a 114 degrees horizontal Binocular vision (A). This is a 2 eye vision, in which our eyes can perceive a single three-dimensional image of the landscape. Let’s see how much we could see in the field in a 330 degree panorama.

Although we apply the same composition rules to a panorama as we do to a standard landscape photo, there are some key differences to consider:
- There will be more distortion in a panorama. How much depends on the amount of foreground present—the closer the foreground, the more distortion will be visible.
- This foreground-to-midground distortion can be used to your advantage. See the distorted foreground panorama.
- The background subject, such as a mountain, will appear smaller due to the wide field of view.
- When using a CPL for a panorama, keep in mind that the sky can appear very dark on one side and bright on the other. The solution is to avoid using the full CPL effect on the sky and instead find a middle ground. Small differences in brightness can be adjusted in Photoshop.
- When taking multiple photos with a nearby foreground, the foreground will shift in relation to the background as you move the camera. A panoramic tripod head can help with alignment, but the good news is that you can still achieve good results without one. Look through your viewfinder and find an object in the background where the foreground aligns. As you move the camera horizontally to take additional shots, adjust your position slightly so that the foreground remains aligned with the same background marker.
When to Choose a Panorama
Consider using a panorama when one or more of the following conditions are met:
- If a single mountain in the background is meant to be the main subject, ensure it
- is large enough so that it doesn’t appear too small in a multi-shot panorama. This
- means you need to be relatively close to a large mountain.
- The panorama frame you envision is filled with interesting subjects that work
- together as a cohesive composition.
- The panorama composition is superior to the composition you could achieve with
- a single shot.
- The basic principles of a strong composition are met. The most important and
- challenging aspect of a panorama is maintaining balance. Using auto-stitching
- can help assess this.

Tele-Zoom
When shooting with a lens that is 60mm or longer, different composition rules apply compared to wide-angle shots. In a tele-zoom photo, the focus is often on the layers or a specific layer. There is less depth because there is no foreground, which also means fewer distractions. More attention can be given to distant mountains or the main subject instead.
Even without a foreground, you can still find leading lines or other elements such as trees, mountains, waterfalls, rivers, and lakes to enhance the composition.
When composing a tele-zoom shot, it is important to maintain balance between the layers. Ideally, you want one primary subject in the far background. The layers beneath it should be evenly balanced, with roughly equal spacing between them. Ideally, no single layer should be significantly larger than the others.

The challenge with tele-zoom photography is the lack of interest and subjects at the bottom of the image(A). It requires a completely different approach to scouting and composing a shot compared to wide-angle photography. The best and simplest way to practice this is by looking through your viewfinder, taking a test photo, and analyzing the composition.
Another useful trick is to frame the scene with your hands—not all the time, of course, but whenever you spot something interesting.
Mountain layers work exceptionally well in tele-zoom photos (B). When combined with a leading line, such as a river, the composition becomes even stronger. The best combination, however, is when you also have a distant standalone mountain in the far background (C).

Drone and Aerial Photography
When shooting landscapes from above, there is no foreground. Therefore, it is absolutely crucial that the midground and background are either interesting or lead the viewer’s eye toward the background subject. Examples include rivers, glaciers, valleys, and mountain layers.

This photography style has one major advantage over ground-level photography: the aerial views you find on Google Earth will closely resemble what you capture with your camera or drone. If you discover an amazing winding river with a mountain in the background on Google Earth, you won’t have to worry about whether a good foreground will be available. Besides scouting compositions on Google Earth for your drone or aerial shoot, it is also important to consider where the sun will rise or set—especially if you plan to shoot into the sun. You can either shoot before sunrise or a few hours after, using a drone such as the DJI Mavic 2 Pro. During this timeframe, lens flare can be an issue because the sun is too low. Of course, there are exceptions when clouds block the sun.

Choosing the Right Elevation
One key decision in aerial photography is determining the altitude above the valley from which to shoot. If you are capturing a winding river with mountain layers in the background, the following rules apply:
- The higher you go, the more mountain layers become visible.
- The winding river will also become more visible in the distance.
- In some landscapes, most of the river quickly becomes visible, while in others,
- parts of the river remain hidden behind mountains. The latter requires a higher
- shooting elevation.
- However, if you go too high, you will lose the sense of depth that the winding
- river creates in the foreground.

Night Photography
In night photography, you ideally want a light source (A) and a reflective surface (B) to achieve better results. The light source can be the moon, the Milky Way, the Northern Lights, or even light pollution. While the Milky Way alone isn’t technically a light source, it still works as a subject (C). Other light sources serve as both a subject and a way to add some illumination to the image.
A reflective surface—such as water, ice, or, to some extent, snow—adds interest to the ground portion of the image. Without it, the ground may lack depth. If no natural light sources are available in the sky, consider using light painting to illuminate foreground objects. The key to successful light painting is using the right intensity, distribution, and angle.

A. Intensity
I use the indirect light painting technique. This involves shining a torch on your hand and using your illuminated hand as the primary light source to paint the foreground objects. This method provides a softer light intensity, which is better suited for long exposures of 30 seconds or more. Additionally, your hand creates a warmer light compared to the harsh beam of a torch.
B. Distribution
Apply light only to the foreground objects you want visible in the final image, avoiding unwanted or distracting elements. Instead of holding the light steady on one spot, move it around continuously, spreading the illumination evenly across the desired objects. Repeat this process until you feel they have received enough light or until the camera exposure ends. This technique ensures the light is applied smoothly and naturally.
Knowing the correct amount of light to use comes with trial and error.
C. Angle
Your position in the field when light painting affects the final image. Backlighting (A), where you stand behind the foreground objects and shine toward the camera, is not ideal. This creates underexposed shadows (B) and looks unnatural, as there is no visible light source to justify such lighting.
Instead, I prefer to stand at an angle between front lighting and side lighting (C). This ensures that the foreground objects are well-lit (D) while maintaining depth and natural contrast.

When shooting the Milky Way, you first need to check how it will appear at a given location and time of year. Apps like PhotoPills can help you plan this.
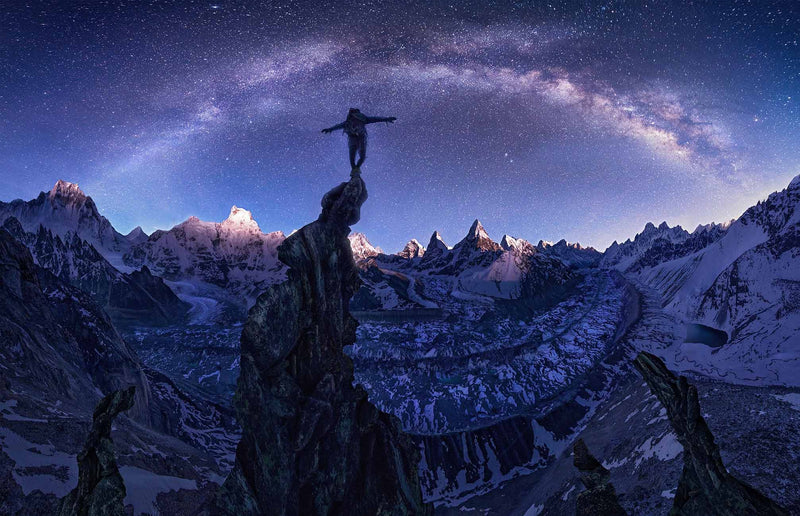
I typically use two different types of compositions. The first is capturing the entire Milky Way and using it to frame a mountain or subject.

This composition requires careful planning to ensure the Milky Way lines up correctly. Its position changes both throughout the night and across different seasons. Keep in mind that this approach demands a very wide field of view, often composed of multiple wide-angle shots. Including an interesting foreground element is therefore highly recommended.
The second way to photograph the Milky Way is to capture only a portion of it—preferably the Galactic Center. In this case, the Milky Way serves as a unique and striking leading line in the sky.

Conclusion
Mastering different photography styles requires an understanding of composition principles and how they adapt to various shooting techniques. Panoramas demand careful previsualization and balance, tele-zoom photography focuses on layering and simplicity, aerial photography benefits from strategic elevation and scouting, and night photography relies on light sources and reflections for depth. By applying these techniques and experimenting with different compositions, photographers can enhance their creative vision and capture stunning, well-balanced images in any setting.





Share your experience, ask a question, or tell us what you would love to photograph.